Monday, March 28, 2011

"The Magic of Amigurumi"


Aaron sent this to me this through Must Have Cute a while back. I think I know how they did it.*


* - They unraveled the crochet and played it backwards.

Wednesday, March 23, 2011

How to Make a Monster Cake

Katie's birthday was on March 6. I knew I didn't have much to spend on gifts, so a few weeks before her birthday I offered to make the cake. I wanted to do something creative, not too difficult, and made with a cake mix. This is what I came up with:

Monster Cake w/plates and candles

It's Monster Cake with a side of Om Nom Cupcakes.


Monster Cake!

It took me a while to decide what to do. I considered making this Rainbow Cake after hearing about it at a party, but I decided six layers were too many. I also considered a different Rainbow Cake, but I didn't like the idea of a cake made from cake mix and Sprite. (Later on I read the directions more carefully and found out that it should work with regular cake batter. But by then I was already sold on monster cake.)

While I was brainstorming, Mom showed me a Taste of Home magazine that featured monster cupcakes for Halloween. These looked too difficult for me to make, but they inspired me to make this cake.

Om Nom Cupcakes

I needed a cupcake for the eyes, and I was going to have a lot of extra batter, so I made a "side" of cupcakes. I think the "Om Nom" on top complemented the monster.

Katie had suggested a rainbow chip cake a while back, so that's what Mom bought, along with white icing that came with sprinkles. (The icing had a catchier name than "White Icing with Sprinkles" but I can't remember it.) Mom bought it before I decided what my cake would look like. Luckily, it worked.

Cake Time

I think I used a nine inch round cake pan. It may have been eight inches. Whatever it was, I learned the importance of flouring the pan after you grease it. We ended up with some crumbly spots around the edge.

I used cupcake papers for the cupcakes, so I didn't have to worry about greasing the cupcake pan.

The monster ate the candles!

(Putting the candles in the mouth was Mom's idea. I wanted to put them in two of the cupcakes.)

I mixed the batter according to the directions on the side of the box, filled the round pan and poured what was left into the cupcake papers. I ended up with really big cupcakes, so it may be possible to get seven cupcakes out of the rest of the batter.

Once everything was baked, out of the pan and cooled, I started assembling the cake. I cut one of the cupcakes into three rounds, and iced each one with the white icing. These would be the eyes.

Then I mixed yellow and green food coloring into the remaining icing. I used the ratio recommended on the side of the box for "lime." If I were to do it over, I would have made the icing darker.

I iced the cake with the green icing and placed the three cupcake rounds along the top of the cake for the eyes. The rest of the icing went on the five other cupcakes.

Lighting the Candles

I made a trip to Central Market while the cake cooled to get cake decorations and some gifts (including chocolate covered orange peels and chocolate covered gummy bears.) I wanted to get some prepackaged icing already in the tube to add the details, but the options at Central Market were pretty expensive. I ended up getting some embellishments from the bulk candy section instead.

Om Nom Cupcakes

I bought Strawberry Licorice Pinwheels for the mouth and the "Om Nom" on the cupcakes. I unwound the pinwheels. There was a nice groove down the middle of the licorice, so cut them in half lengthwise. I cut the licorice into pieces for the mouth and teeth. The monster ended up with such a big mouth because it was easier to go with the curve of the licorice rather than trying to reshape it.

By the time I got to the cupcakes, I was tired from cutting the licorice lengthwise. Stirring the food coloring into the icing and cutting the licorice were the two parts of the process that hurt my shoulder and back the most. So the pieces I cut for the N and M's were fatter. I used the swirly middle of the pinwheels for the O's.

The pupils in the eyes were those Gummy Raspberry and Blackberry Candies with candy "seeds" on the outside. I picked out three blackberries and put one in the center of each eye.

Finally, I spread the sprinkles on the three remaining cupcakes. My creation was complete.

"Proud to be Awesome"
(Yes, they have matching shirts.)

Katie liked the cake. She was surprised, especially since she had forgotten that I volunteered to make the cake in the first place. I'm pretty proud of myself. There are lots of cake ideas on the Internet, but I came up with an original idea. And now it's on the Internet for other people to use.

As usual, there are more pictures of the cake and the party on Flickr.

Parting Shot: Other People's Projects (OPP)

Katie and Aaron just finished sewing their own zafus this week, with some help from Mom. They wanted to make their own to sit on in their martial arts classes. Of course, I had to take a picture of the finished products.

Katie and Aaron and their Zafus

Thursday, March 17, 2011

WIP: Baby Surprise Jacket

WIP: Baby Surprise Jacket

I've been so distracted with "A Knitted Wonderland"* that I've gotten behind on my blogging. I have two FOs, a cake and a new WIP to talk about. I'm starting with the WIP.

It's my very first Baby Surprise Jacket!

WIP: Baby Surprise Jacket

Back in January I said I was daydreaming of a sweater made from my stash. I wanted a cardigan that was seamless or almost seamless. Mom suggested that I look through her old Wool Gathering newsletters for patterns. When I saw the Baby Surprise Jacket pattern, I immediately knew that was what I wanted to make.

In The Opinionated Knitter there's a pattern for an "Adult Surprise Jacket," the Baby Surprise Jacket's grown up counterpart. It's perfect for my epic stash sweater.

But first, I'm taking the author's advice and making a Baby Surprise Jacket before I embark on a larger sweater. I'm still trying to wrap my head around the pattern.

WIP: BSJ unfolded

The Baby Surprise Jacket is both very simple and very complicated. Basically, you knit a wonky rectangle, fold it, seam the shoulders and end up with a cardigan.

At the beginning of the jacket I had no idea what went where until I did a row of increases to create a cuff. At that phase it was hard to imagine that I was knitting sleeves. A little while later, I was binding off a few stitches for the collar. It started making sense in my mind.

There are diagonal increases and decreases that work well with variegated yarn and makefor some interesting stripes. I went with some variegated yarn from stash. I would have liked to add some stripes, but I don't have anything that works with the yarn I found.

I'm using Baby Bee Sweet Delight from Hobby Lobby. I bought it ages ago for because I liked the bright colorway. So far, I'm happy with it. It's a nice for a machine washable synthetic yarn.

There's a point where the increases and decreases meet in the picture above. That's the armpit. If you fold what I have so far, you get this:.

WIP: BSJ, folded up

This pattern, like most Elizabeth Zimmerman patterns, is more like a recipe than a set of instructions. Specific row numbers aren't listed. So I want to leave some notes about row numbers, increases and decreases for myself and anyone else who's interested. If you follow her original instructions exactly, you'll probably have the same row numbers.

The original pattern suggests a gauge of five or six stitches per inch. I'm knitting five stitches per inch, mostly because that's what I got with this particular yarn and the first needle I could find. Five stitches per inch makes a size for a baby around one year old. Six stitches per inch will get you a newborn size jacket.

I think row ten was where I did the increases for the cuff. I spaced them out so that there was no M1 next to the marker.

At row 43 I found myself with 91 stitches, not 90 as the pattern says. I looked carefully at all my decreases. I think I decreased by two stitches instead of three in the first row. So on row 44, the first of the "work three rows even" I knit two together at the corner where I made the mistake. I think it'll be fine.

Row 47 started the increases, and I think row 60 was where I added the increases to add fullness in the back. I don't think I did a very good job of spacing them out. I miscalculated and one M1 was too far off to the side.

On rows 72 and 73 I did the neck shaping. As of right now I've finished row 79, and on row 80 I'll be doing some more mind bending shaping.

If you're new to the Baby Surprise Jacket you're probably still confused, I'll leave you with "Baby Surprise Jacket - The Movie." It's a short (14 second) video that I posted for the first time in 2008. I tmade it when we found an unfinished Baby Surprise Jacket that Mom had started years ago.


* - We recently found out that our display will be up another week. Now you have until March 25 to see the the installation.

Tuesday, March 15, 2011

"A Knitted Wonderland" Part 2 - FO: Tree Sweater

"The Team" and our tree

Here is our finished product. Tree 34 with it's sweater and its team, Katie, Aaron, Mom and me.

FO: Our Tree

To recap, this is our tree sweater for A Knitted Wonderland. I recommend reading all my tree sweater blog entries if you missed them the first time. That way you can understand the overall project and see how we got here.

We used the assigned yarns, I Love This Yarn in Orange and Turquoise, Red Heart Kids in Pink and Lion Brand Vanna's Choice in Olive. I used US Size 7 needles for my portion. I don't know what size hook Katie and Mom used for their portions.

My top cable

I had two sections with cables. I used a the large middle cable from the Braided Cable Scarf by Miriam Felton in the center, and put two simple cables on either side.

Katie's crocheted portion

Katie used half double crochet for her portion.

Mom's crocheted portion

Mom used single crochet on her portion, and Aaron helped us sew the whole thing up.

In this picture you can see the button and the crochet flower I added. To make the flower, I used the Little Flowers with Leaves pattern by Mimi Alelis. I wish I had added a few more flowers around the top. I think it would have added interest without being too distracting.

One of the crocheted arrows for "A Knitted Wonderland"

The day after installation day was the official project debut at Explore UT. Katie and Aaron had to work and Mom didn't want to fight the traffic. We were all pretty tired, and Explore UT is a massive event. But I wanted to see my tree in action badly enough to pay for parking and deal with the crowds.

I followed the arrows (like the one above) and caught the last part of Magda Sayeg's talk. I even helped answer an audience member's question about how long it took to make the tree sweaters. (Basically, I said it took me a month to make half of our tree, but it's hard to break that down into hours.)

Two kids stop for a photo op with our tree

After the talk I spent some time outside watching our tree to see if we had any tree huggers. I saw a few people take pictures with it, including the woman above. She took a picture of two little girls posing with our tree. This woman took a picture too. And that's just what I saw while I was sitting on a bench.

Glove-Ballon stuck in a tree

Some group was filling rubber gloves with helium and handing them out like balloons. They were all over the place. I saw one kid accidentally let go of his glove/balloon under our tree. It ended up stuck in the branches. The boy tried to knock at the balloon by tossing his water bottle at it before he gave up.

It's amazing the sense of ownership that developed after we put the sweater on the tree. I wasn't too worried about the glove/balloon, but I felt like it was my responsibility to do something because it was in my tree.

I wonder if it's still there. It seems like it would have lost helium and fallen out of the tree by now. Or eventually someone in charge of maintaining the campus would have seen it and gotten it out. There's no way I could reach that with my ladder. (Not that I had it with me during Explore UT.)

"A Knitted Wonderland" at Explore UT

On Friday, March 18 it all comes down, and that makes me sad. But my family and I got to be part of something really cool. I'm glad I saw the link on Facebook, otherwise I would have missed the whole thing.

There are links about this project all over the Internet. I'll leave you with a link to all of my pictures and some coverage from The Daily Texan.

A Knitted Wonderland from The Daily Texan on Vimeo.

Wednesday, March 9, 2011

"A Knitted Wonderland" Part 1 - The Installation

Tree Sweater Installation

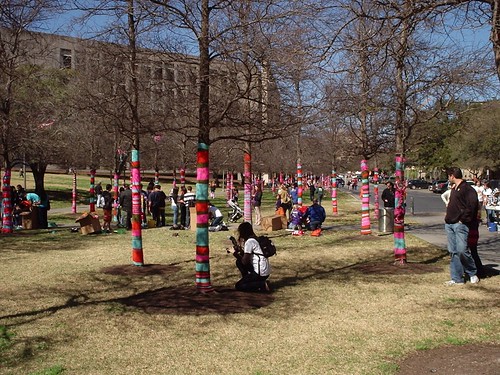
Last Friday was installation day for A Knitted Wonderland, and I think I've spent more time uploading pictures to Flickr than I did sewing up the sweater. I have so many pictures, I've decided to share them over two blog entries.

Seaming everywhere!

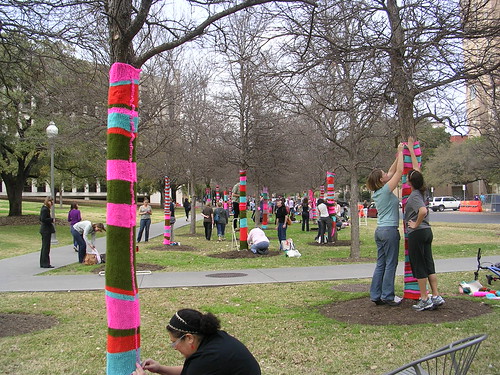
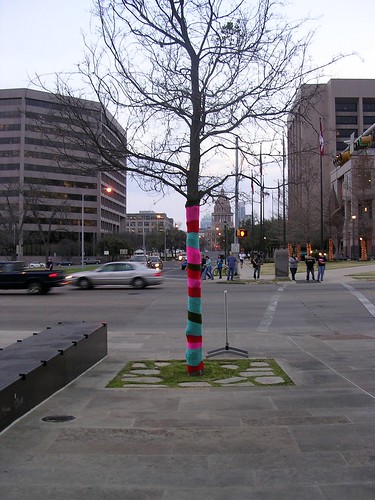
In case you're tuning in late, "A Knitted Wonderland" is the latest project by 
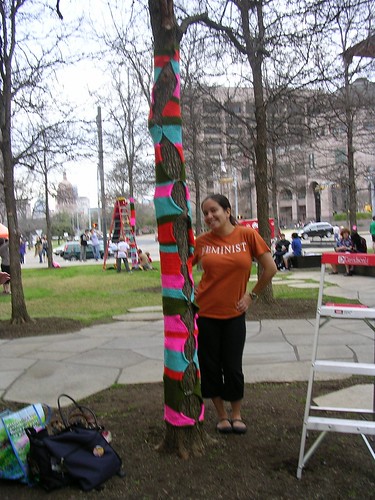
Magda Sayeg, who is known for her 
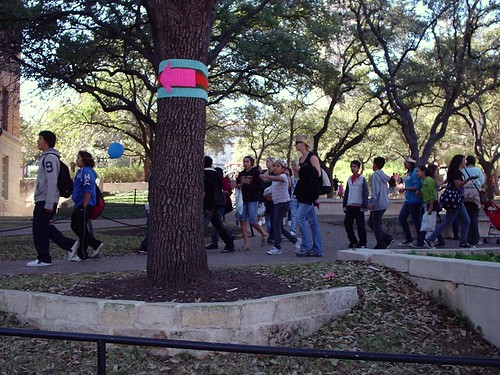
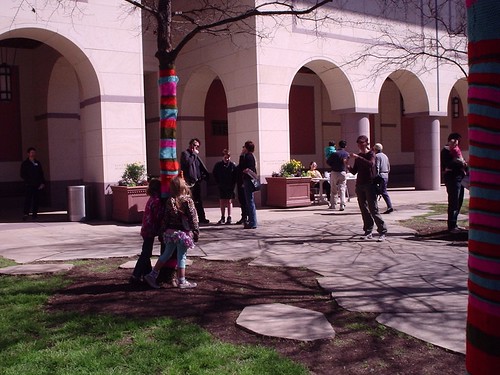
yarn bombing work. In January she invited knitters all over the city to help her cover the 99 trees in front of the Blanton Museum. I've written more about it in greater detail in previous entries.

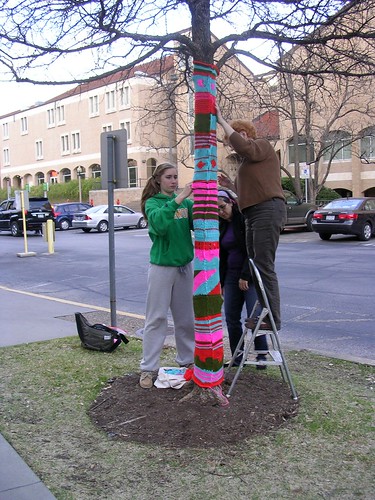
Mom, Katie, Aaron and I arrived in the afternoon not long after the installation officially began. I packed the leftover yarn, some carefully selected knitting notions, safety pins, water, an old sheet to sit on, sunscreen (that we didn't need) and a ladder.

I couldn't wait to get started when I saw the very first people sewing up their tree sweaters. I went to the front desk to get our tree sweater and signed in at the table. All four of us had to sign waivers, one for using ladders and one allowing people to take our pictures. Apparently someone is filming the process for South by Southwest. They had drinks and cookies, although they went fast.

Katie and our "basting"

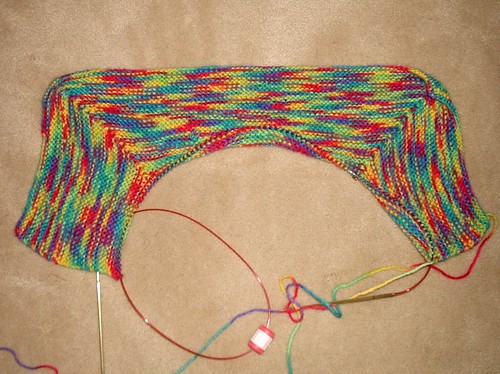
Mom was the one that suggested safety pins, and that was a good idea. I was thinking we'd baste the sweater, but pinning it was easier. We were told to leave some negative ease, so it was pretty tight. We were worried at first. I knew we'd figure 
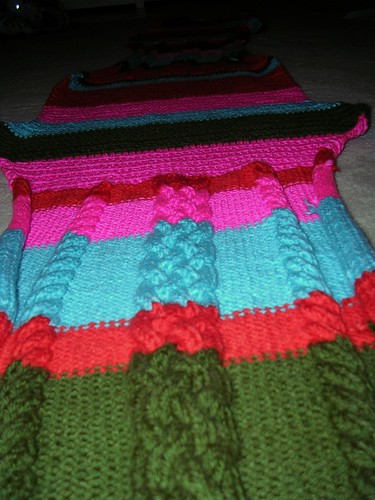
something out. You can see the big gaps here.

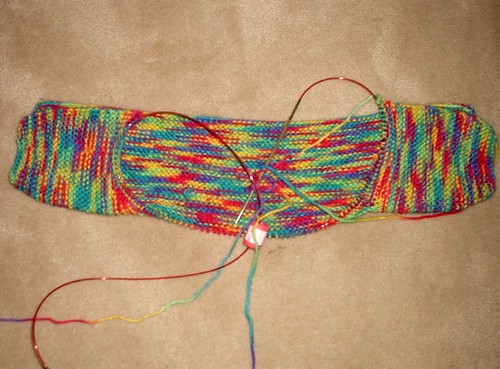
But once we started sewing, it started coming together.

Katie and I sew the seam

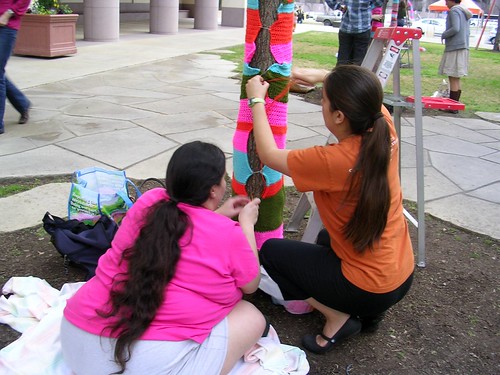
We started at the bottom and worked our way up. We could get away with being a little short on top, but not at the bottom. It ended up being about the right length. I found that sewing was easier if we moved the safety pins to close the gaps as we seamed. That way we didn't have to pull together so much fabric at once.
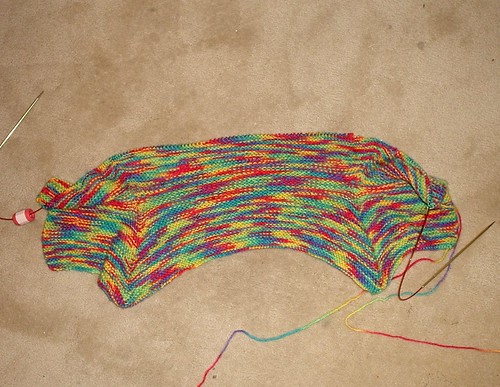
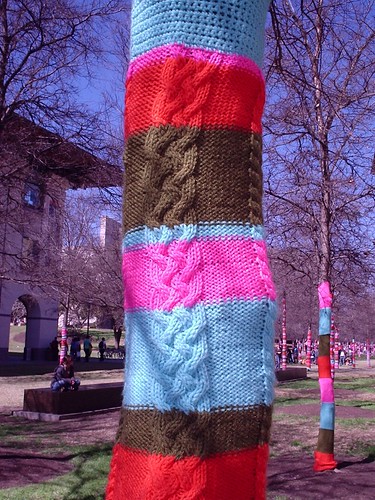
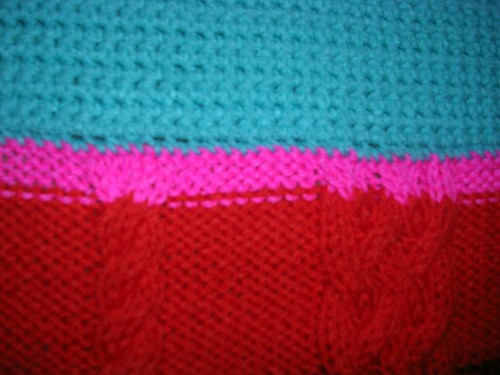
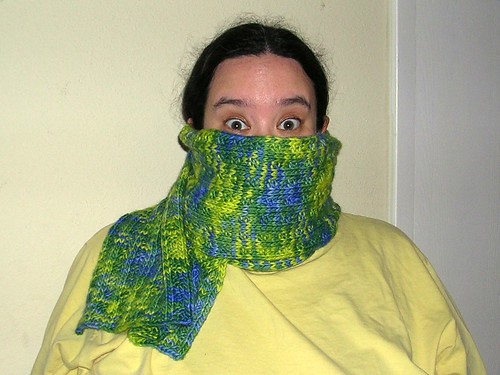
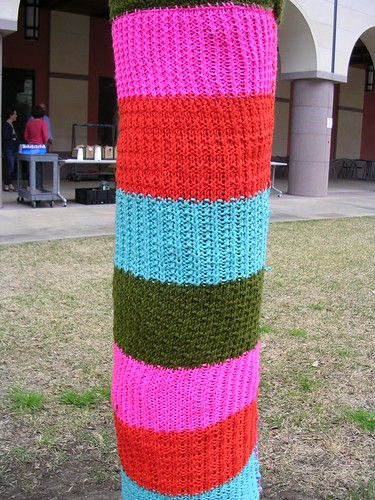
Where knitting meets crochet

I used the Mattress Stitch on the knitting section, and the stitch was close to invisible. I showed Katie and Aaron how to do the mattress stitch, and they both caught on pretty quickly. (I think Mom already knew. I learned it from The Knitters Book of Finishing Techniques a while back.) I think Aaron did a big chunk of the seam in this picture. We took turns sewing, so I've lost track of who did what.

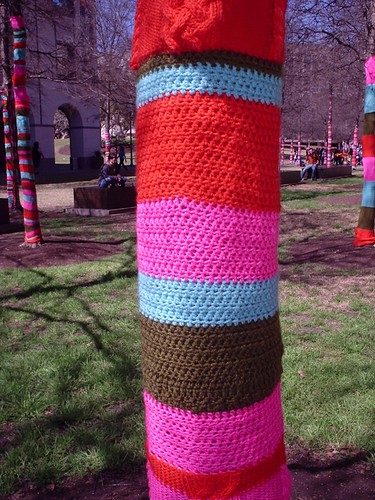
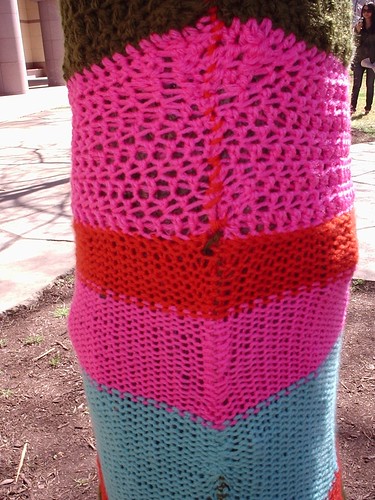
As you can see, we just whip stitched the crocheted sections. We didn't know any awesome techniques for seaming crochet.

Aaron sews while Mom adjusts the seam

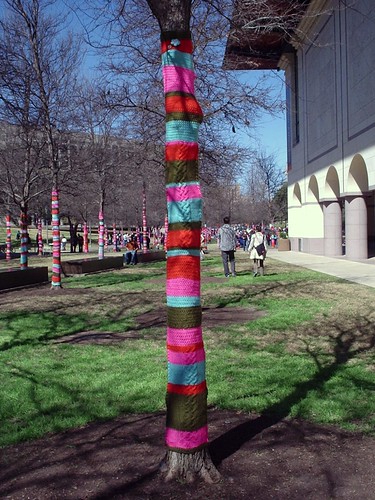
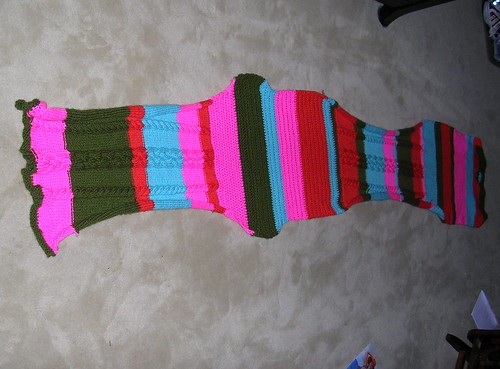
Getting the seam straight was easier because we pinned the tree sweater first. You can see Mom straightening out the tree sweater here.

Despite all our measurements, the tree is kind of unpredictable with all it's knots and bumps. There's one area in particular where my cable looks pregnant. But that's part of the fun, and knitting is forgiving.

There was one team* that managed to get everything almost perfect. I wish the picture I took wasn't so blurry. They made a little "skirt" at the bottom and left a hole for an especially large knot. They may have been the only team to use all ribbing, which is smart. Ribbing will stretch as much or as little as you need it to. I was impressed. We weren't nearly that precise.

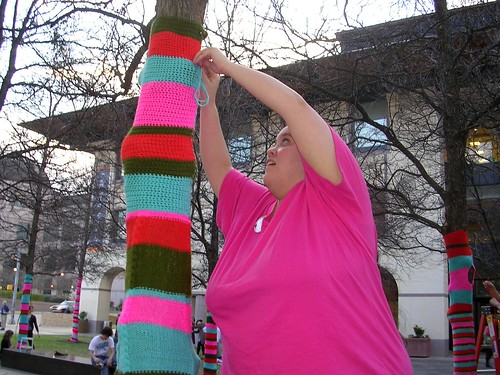
Off and on we all took breaks and went to run around and see the other trees. I ran into Alicia from the Austin Meetup Group sewing the tree sweater for her team. I also saw Sandra Singh and helped her find a tree 55. She took our picture and put it on her blog.

Tree Sweater with Sleeves

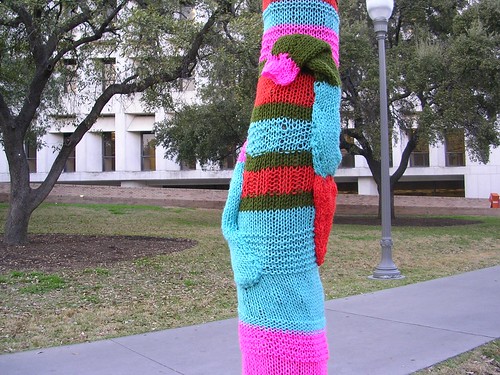
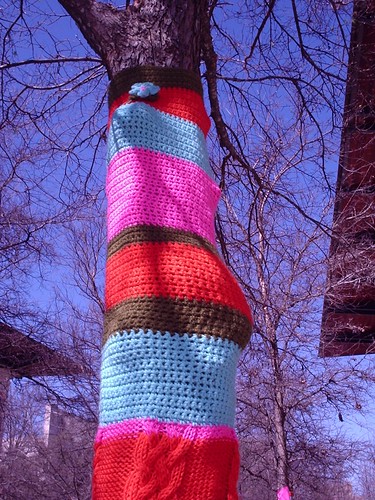
I have all my pictures here. I'm going to share some of my favorites, like the one above. This team added sleeves to their tree "sweater."

A different stitch pattern for every color

This tree has a different stitch pattern for every color. We debated doing something similar, but I don't think we could have gotten it this uniform.

This is one of my favorites

I really like this one. This group managed to do a lot of colorwork while following the guidelines.

I also saw stripes within stripes, people with matching accessories and a snake. I wish I could have taken a picture of every single tree.

I couldn't work up top too long

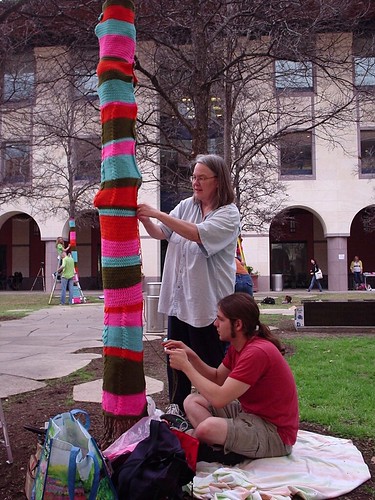
I was worried that we wouldn't finish in time, but we got to the top faster than I expected. For the record, I did do some work from the ladder. I couldn't reach up this high for very long because of the pain from the pinched nerve, but I wanted to say I did it. (Mom did most of the work from the ladder.) I was really worried that I wouldn't be able to do this because of the pain. Of course, frequent breaks, three people to help sew and carry everything and a Flector Patch helped.

Tree Sweater with a good view of the Capitol

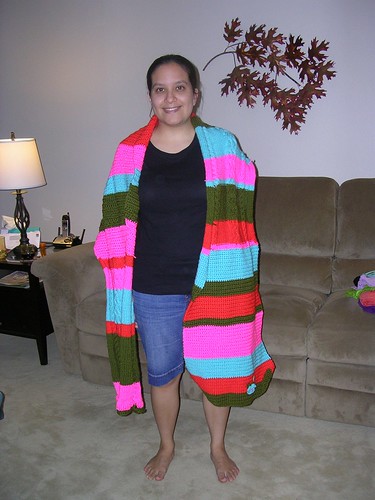
At dusk, we were finished, and we had time to spare. Installation was blast. I talked to so many people. Two men visiting from New York asked us a bunch of questions about the whole project, and several knitters complimented my cables. We had a great tree ready for Saturday.

And Saturday is a story for another entry.


* - I'm assuming these were teams. I know a few people knit entire trees all by themselves, but most people worked in groups.

Thursday, March 3, 2011

Tomorrow is Tree Day!

Cables!

Tomorrow is the installation day for A Knitted Wonderland , and I'm both excited and nervous about sewing up our tree sweater.


I
blogged about the project about a month ago when we were still putting it together. A couple of weeks ago we finished our sweater and dropped it off at the Blanton Museum. But not before we took lots of pictures.

Katie wears the tree sweater as a scarf

As planned, I knit two 21-inch pieces, Katie crocheted one and Mom crocheted one. This should cover seven feet of tree.

Tree Sweater Seam

I was the one who sewed the whole thing together. Overall, I think I did a good job, especially when you account for having to sew the knitting and crochet together and the small differences in length and tension. I don't think there is a name for the sewing technique I used.

I have pictures of the other two seams as well. There's another fairly neat seam, and there is a messier seam where my cast on was too loose.

My embellishments

I also added a button and a crocheted button like I mentioned before. They are sewed at the top of the tree sweater, so they shouldn't be too distracting. For the flower, I used the Little Flowers with Leaves pattern by Mimi Alelis. I'm pretty sure the button was once on a pair of my pants, since it has "Venezia" embossed on it.

Mom's Piece

I managed to mess up Mom's piece. Apparently I sewed it "wrong side out." I'm adding quotation marks to that phrase because I had no idea that single crochet worked in rows had a wrong side. If you look closely, the rows line up into nice pairs. Mom made a point of changing colors between those pairs to avoid breaking them up. Since those pairs of rows are staggered, the pairs are broken up on the other side. On this picture you see the right sided folded over onto the wrong side.

If you can't see the difference, I don't blame you. It took a while for me to wrap my head around it. Basically, my Mom is a perfectionist.

The "Team"

All three of us will be out at the Blanton tomorrow putting this thing up. If you have any tips, let me know. I'm not sure whether to start at the top or the bottom of this thing. We're planning to sew it up, but I may bring a crochet hook just in case. (They've officially said no to zip ties.)

I've never sewn anything together while balancing on a ladder before, and I'm still hurting. I don't know if we're all planning to sew, or if one person is going to sew while everyone else helps hold things in place and steady the ladder. We haven't gotten that far yet.

Katie models our "sweater"

The installation is officially "open" on Saturday, March 5 as part of Explore UT. The Austin American Statesman had a special section for the event in the paper today, and it included a blurb about "A Knitted Wonderland."

So come for the knitting, stay for... just about anything else you can imagine. Seriously. There's a really long list of activities for Saturday. Go check it out.

Parting Shot

When I wrote about my Centipede Scarf, I forgot to include my favorite picture in my favorite pose. I guess it's better late than never. Enjoy.

FO: Centipede Scarf