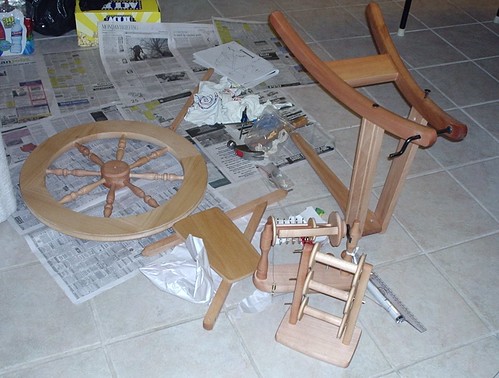
I started by applying the third coat of tung oil early in the afternoon and letting it dry. After lunch and running errands, I started the assembly around 5 or 5:30.
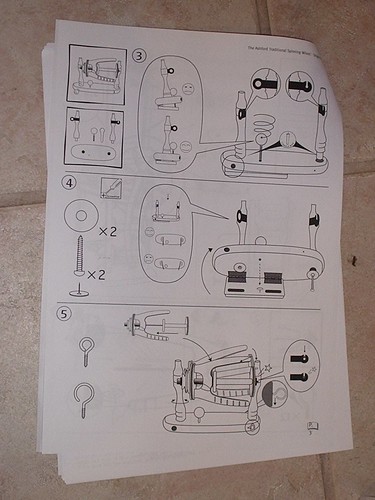
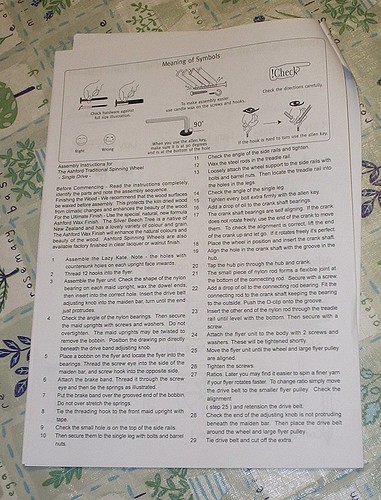
Here's an example of what the instructions look like. There's almost no text, and a bunch of pictures. I had trouble with it. Mom said it was easy for her. Half the time I couldn't understand what they were trying to get across.
Take a look at step five at the bottom of the page. I thought the stars meant "ouch" like they normally do in cartoons. So I assumed they were warning me that if you have the flyer at the wrong angle, it will bang against the other parts. But after conferring with Mom, I realized it meant that the flyer should snap in place.
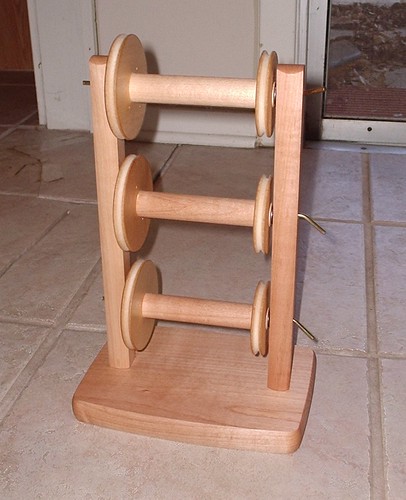
Step One was to assemble the Lazy Kate. That was easy enough. The instructions had a picture of pliers, but I have no idea why. I didn't need them.
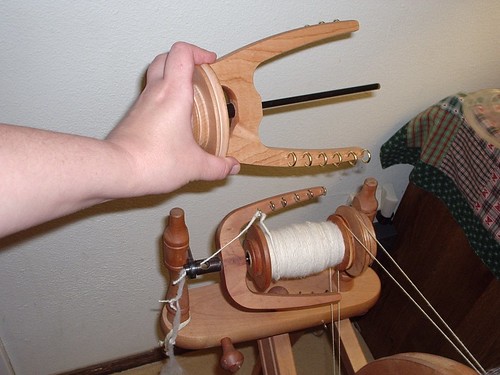
Step Two was to put the hooks in the flier. That was pretty easy. I rubbed them with candle wax as recommended by one of the little drawings on front.
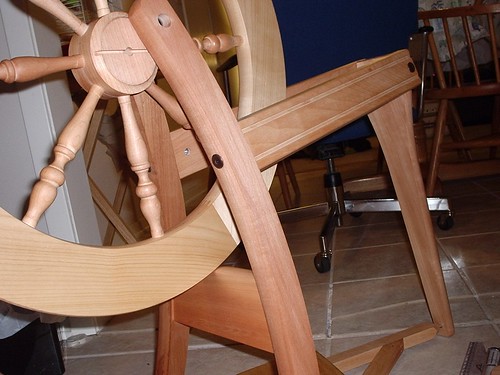
I was lucky my wheel is a lot like Mom's, except her's has a double drive band and mine has a single drive band. My flyer is bigger than hers, and my hooks face the other way. (I had Mom check the instructions. I got the hooks right.)
Here is the "Mother of All," completely put together. If you want to see what all the parts are called, visit the Flickr page and mouse over the picture.
I had trouble screwing in the maidens. It turned out I was using the wrong size screw. I didn't realize all the drawings of pieces were to scale. There was a drawing on the first page explaining this, but I didn't get what they were saying.
I took this picture when I stopped to eat dinner. I realized after dinner that I had forgotten to put the treadle on the wheel support before I screwed everything together. I had to unscrew most of it to put in the treadle.
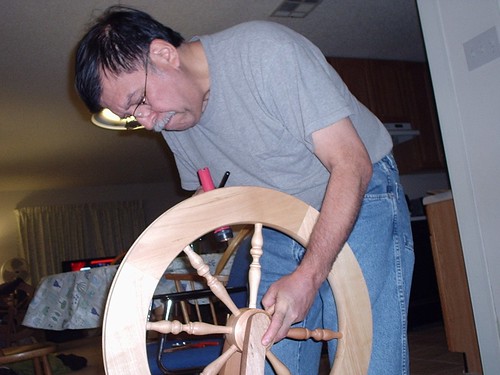
Step 18 was putting the wheel in the wheel support. This was by far the hardest part. The wheel did not want to go in. (When I took this picure, this was as far in as the wheel would go.)
I had trouble getting the whole thing together, so I tried loosening everything. Then Dad took out some of the screws and put them back in, and we were able to barely get the wheel in.
Of course, then we had to get the axle through the wheel and the wheel support. This was very difficult. There wasn't enough space between the wheel and the wheel support to see. We finally got it on, but it wasn't centered.
Dad finally got it centered. He realized the rubber pieces that hold the axle weren't in all the way. (They were flush with the wood on Mom's wheel.) Things got easier after he pushed them in.
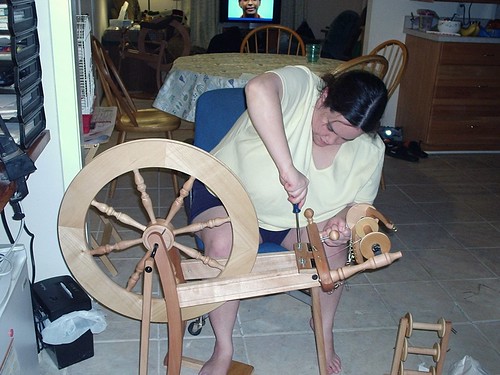
Here's me working on Step 26, attaching the mother of all to the rest of the wheel. I'm almost done here. And that was about the time I discovered this...
...full written instructions to go with the pictures.
*sigh*
I tied on the drive band, and adjusted the position of the mother of all. I think I solved most of the problems before I got it home, but I still need to make adjustments.
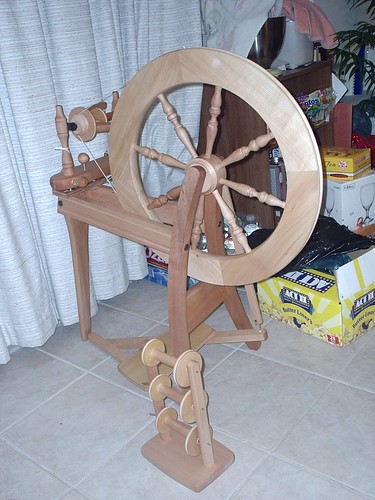
This is my wheel. His name is Douglas. And he is in my bedroom right now!
You can see all the pictures I took while assembling the spinning wheel on Flickr.


3 comments:
Thanks for posting the written instructions Sally. Came in handy.
THANK YOU, THANK YOU, THANK YOU! My single drive Ashford arrived yesterday, and I am so afraid to get started on the assembly. Your pictures and explanations are so helpful!
Hello, thanks so much for posting the assembly of the Ashford spinning wheel.
After 2 years that I moved overseas I had to dessamble it, now thank to your post I can put it back together.
I have only one doubt, the hub pin that goes into the crank, has a groove, to what side goes that grove?
I hope to find out this before puting this last piece.
thanks in advance
Isabella
from Argentina
Post a Comment